Administrator Guide
How to install this add-on?
Install from the Universal Plugin Manager
- Login with a JIRA administrator account in your JIRA instance.
- Click the
 from the top menu and choose Add-ons
>> The Manage add-ons screen loads. - Select Find new add-ons from the left-hand menu.
- Locate ReceiveMe! via search.
>> Results include add-on versions compatible with your JIRA instance. You will not find the add-on if your JIRA version is not supported. - Click Install to download and install your add-on.
- You're all set!
>> Click Close in the Installed and ready to go dialog.
Alternative: Download ReceiveMe! from Atlassian Marketplace
- Download ReceiveMe! from the Atlassian Marketplace.
- Login with a JIRA administrator account in your JIRA instance.
- Click the from the top menu and choose Add-ons
>> The Manage add-ons screen loads. - Select Manage Add-ons from the left-hand side of the page.
- Click Upload Add-on in the Universal Plugin Manager screen.
- Locate the ReceiveMe! jar you downloaded in step 1 upload it.
- You're all set!
To find older ReceiveMe! versions compatible with your JIRA instance, you can look through our version history page.
On this page
Looking for the Project configuration of ReceiveMe!?
Setup
Login with a JIRA administrator account in your JIRA instance.
Click the
from the top menu and choose Add-ons
>> The Manage add-ons screen loads.Select Configuration to configure ReceiveMe! from the left-hand side of the page.
- Add an administrator or a usser with suffient permissions to create new users, issues, comments.
- Click on Send button.
Click the
from the top menu and choose SystemClick Incoming Mail under the Mail section, from the left hand menu
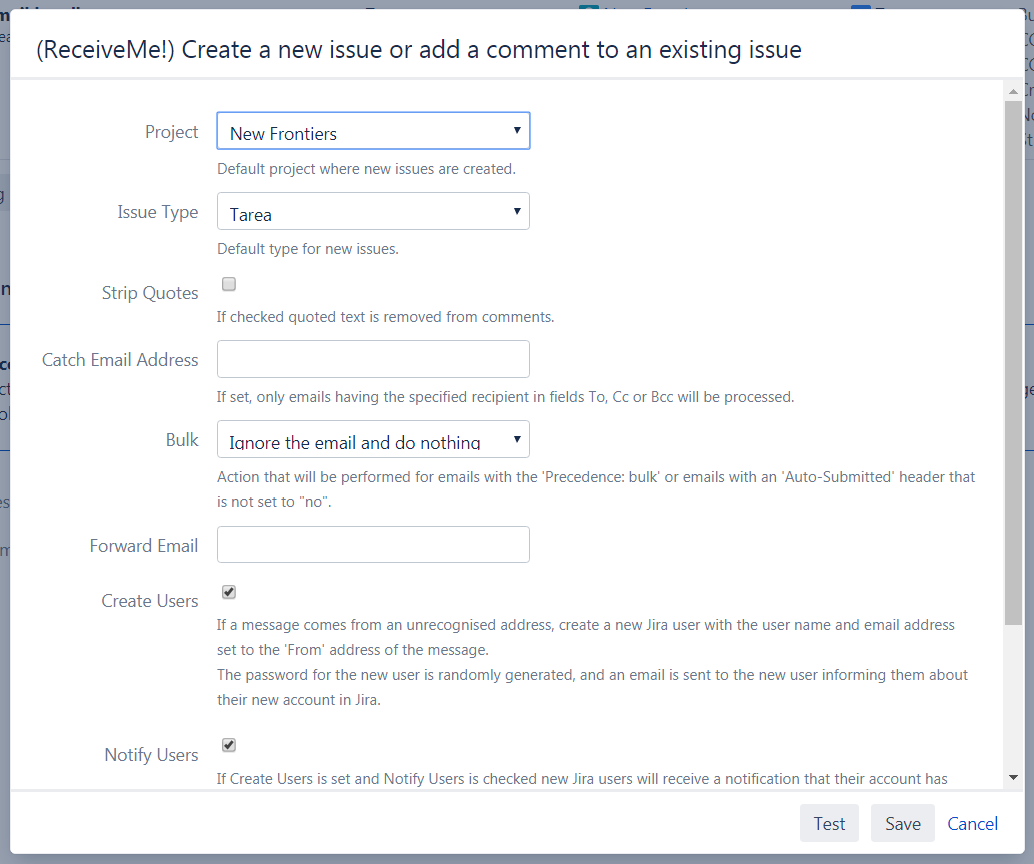
Click the button Add incoming mail handler.
Give your mail handler a meaningful name and select a Server. Use the Handler option (ReceiveMe!) Create a new issue or add a comment to an existing issue and click Next.
Select the Project for which you want to create issues, as well as the types of issues to create. You can also indicate whether you want to create the user in JIRA and other options.
- Click Save to start using ReceiveMe!
Users created by ReceiveMe! will not count against the your Jira's user license and therefore they won't be able to access Jira but they will be able to comment and create issues by email.
Configure a superuser
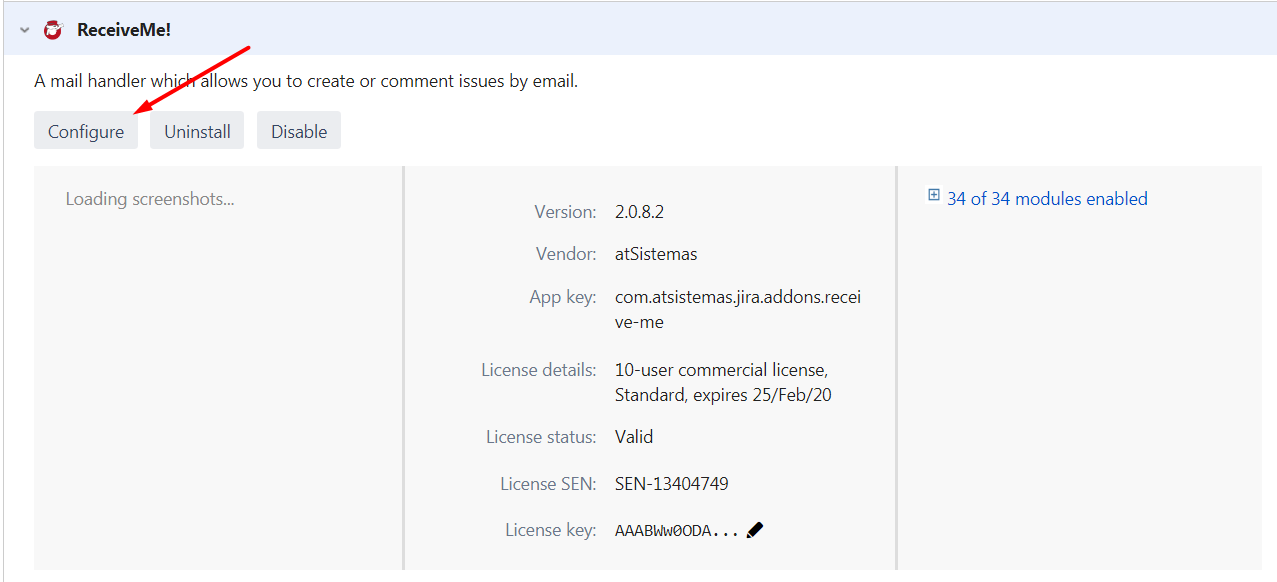
ReceiveMe! performs automatically some actions behind the scenes, such as create users, issues, comments or execute transitions. Therefore, it is required to specify a user with all those permissions in order to ensure that ReceiveMe! works correctly.
To do that you only need to click in the Configure Button after installing the app:
Then, simply use the group picker to select the desired user:

Disable message Id logging
ReceiveMe uses Jira's internal database to save the id of the incoming emails. This is a procedure that emulates default Jira's mail handler. This helps to identify if a given email is related to an issue even if no issue key appears in the subject. You can switch it off by checking this option. This could prevent a higher database consumption in some configurations. In case of doubt leave it unchecked.
Create user names
If checked, ReceiveMe will try to create the display name for the users created by the mail handler using the name of the address instead of the email. For example if an email is received with this from Tania Jones<tjones@mycompany.com> then ReceiveMe will create an user with the display name "Tania Jones". Otherwise, ReceiveMe will create the users with the sender email address as display name.
Disable Description Check Size
If checked, ReceiveMe will no truncate the description when creating an issue or comment, although it exceeds the default description field size limit (32767). It should be checked when the field description has been customized. It apply only for HTML format.