Administrator Guide
How to install this add-on?
Install from the Universal Plugin Manager
- Login with a JIRA administrator account in your JIRA instance.
- Go to JIRA and click the
 from the top menu and choose Add-ons
>> The Manage add-ons screen loads. - Select Find new add-ons from the left-hand menu.
- Locate NotifyMe! via search.
>> Results include add-on versions compatible with your JIRA instance. You will not find the add-on if your JIRA version is not supported. - Click Install to download and install your add-on.
- Add your licence key in the shown licence textbox and click OK.
>> Alternatively, you can get a trial pressing the 'Free trial' button. - You're all set!
Alternative: Download NotifyMe! from the Atlassian Marketplace
- Download NotifyMe! from the Atlassian Marketplace.
- Login with a JIRA administrator account in your JIRA instance.
- Click the from the top menu and choose Add-ons
>> The Manage add-ons screen loads. - Select Manage Add-ons from the left-hand side of the page.
- Click Upload Add-on in the Universal Plugin Manager screen.
- Locate the NotifyMe! jar you downloaded in step 1 and upload it.
- Add your licence key in the shown licence textbox and click OK
>> Alternatively, you can get a trial pressing the 'Free trial' button. - You're all set!
To find older NotifyMe! versions compatible with your instance, you can look through our version history page.
Important: outgoing mail
In order to be able to use the NotifyMe! add-on, it is mandatory to have an outgoing email configured in your server, if not 'Send by email' button won't be displayed. For further information, please refer to JIRA's official documentation.
Project settings
From version 2.0.3 onwards you have extra options in the project configuration screen:
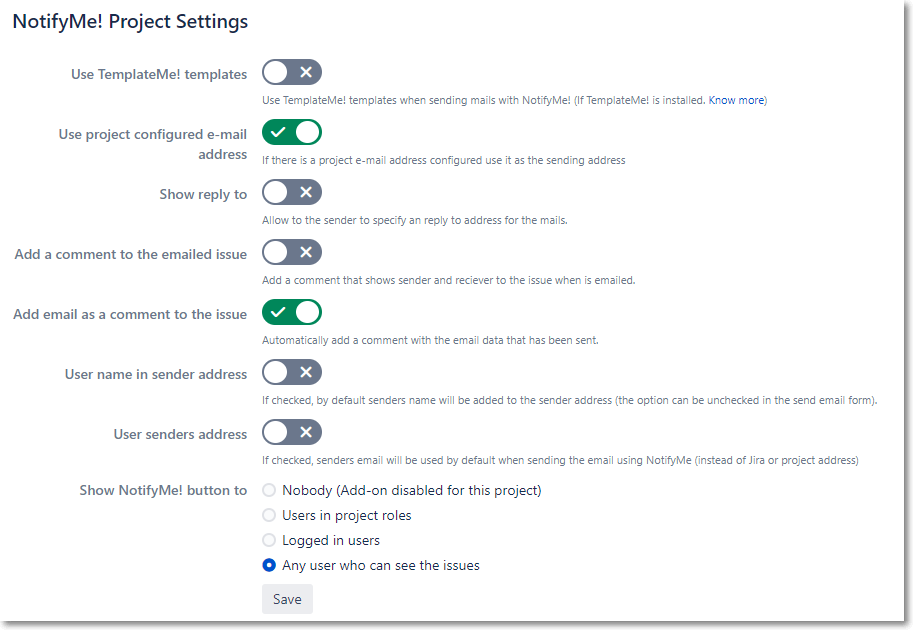
Use TemplateMe! templates: You can enable or disable the use of TemplateMe! templates when sending emails with NotifyMe! (you have to have TemplateMe! installed for use this option).
Use project configured e-mail address: If your project has a configured email you can use it as the from address.
Show reply to: If you enable this option a new field will appear in the send email form. You can specify then an email address that will be used when someone reply to your emails. This is useful if you have a noreply sender address configured in your project/Jira instance and want to receive emails in a different address.
Default reply to address: If the previous option is enabled you can specify a default email address for the reply to field. Please note that the user that send the email can specify another address when filling the send email form.
Add a comment to the emailed issue: If this option is enabled then a comment will be added to the issue when a new email has been sent. Please note that this will trigger the Issue Commented notifications!
Add email as a comment to the issue: If checked, NotifyMe! will add the e-mail send as a comment in the isssue.
User name in sender address: If checked, the current username will be added in the sender address. This option can be unchecked by the users in the send e-mail form, before sending a new e-mail.
User senders address: If checked, the current user e-mail will be used as the sender e-mail, instead of Jira or project e-mail address.
Show NotifyMe! button to: Choose who can see NotifyMe! button in this project.
TemplateMe! integration
TemplateMe! is the app to choose when you want personalized and powerful email notification templates. If you have TemplateMe! installed NotifyMe! emails will use the default template for the project. Take a look to TemplateMe! documentation in order to know how to add custom text to your emails.
Send email postfunction
(From NotifyMe! version 2.0.5 onwards) NotifyMe! allow you to send emails directly from workflow transitions.
In the postfunction dialog of the workflow you want select this option:

Then use the send email form to specify the email details
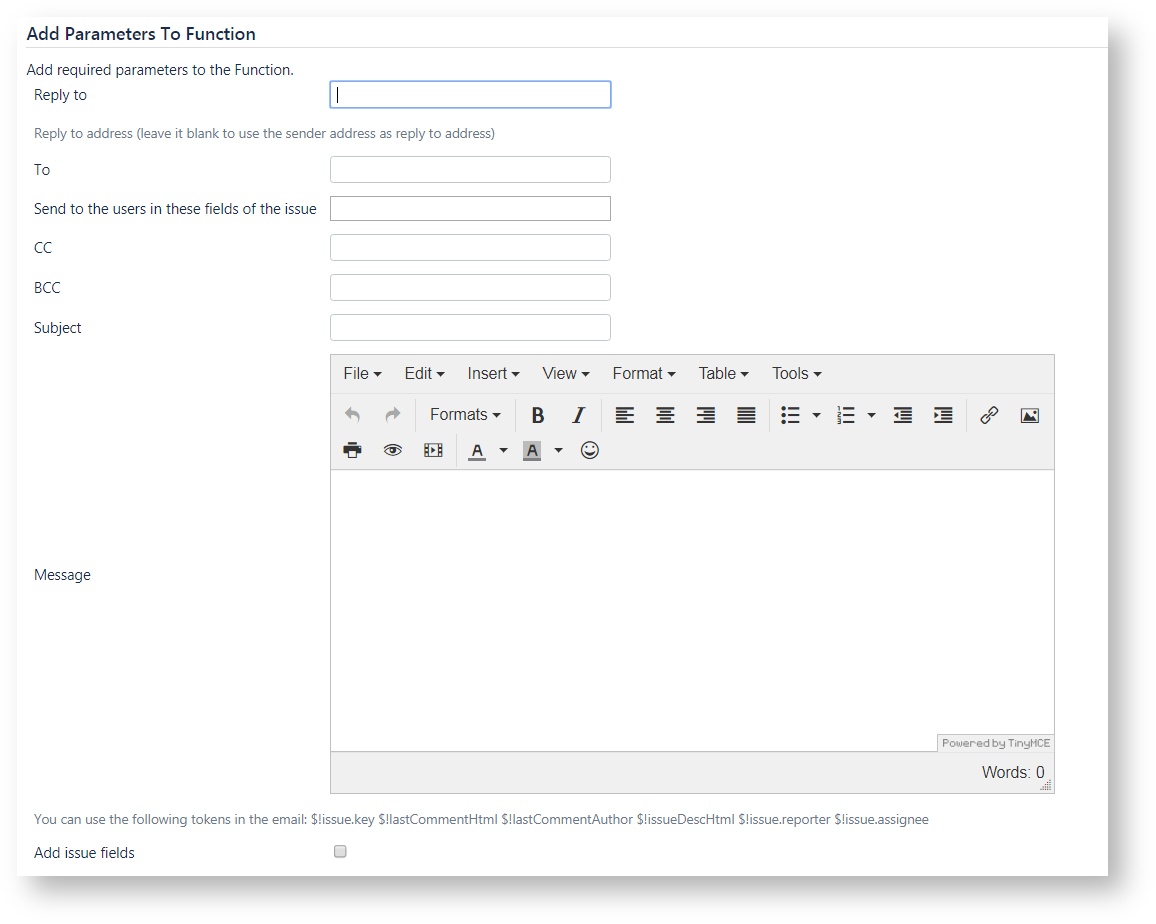 Take a look to the user guide in order to know more about these fields.
When you are done click the Add button and a new postfunction will be added to your workflow. When this transition is triggered NotifyMe! will send an email. Please note that if you have enabled TemplateMe! for this project then the email will be sent using the configured TemplateMe! template.